If you are reading this article, the chances are – your industrial pump unit has given up on you. You’re most likely wondering: How can I repair my industrial pump quickly and with as minimal investment as possible?
Generally speaking, you have two options:
- Arm yourself with wrenches, lifts, new packing, lubricants, and vibration/heat checkers and use the industrial pump repair procedure outlined below to your advantage during the process.
- Hire an industrial pump service company and avoid the hassle.
Independent of which option you choose, this step-by-step industrial pump repair guide will help you better understand the repair process and prepare you for what comes next.
A word of warning: If you are planning to do everything yourself, make sure that you have a clean, spacious warehouse with all the required instruments and the technical knowledge needed to repair an industrial pump.
Without further ado, let’s get started!
Step-by-Step Industrial Pump Repair Procedure – Revive Your Unit with These 9 Steps
Ensure that you have all your tools prepared and that your storage facility is clean of dust and other particles. Once you are ready to proceed, complete each one of the steps below strictly in the order that they are presented:
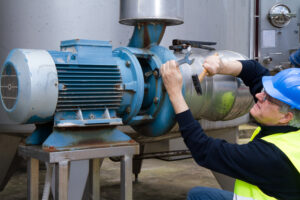
#1: Check the Pump Packing for Poor Seals and Cracks
The most common problem with any industrial pump is leakage from the wear and tear of the pump casing or cracks in the construction. You should check all the connectors on the pump and ensure that the maximum production leakage rate is 20 drops per minute. If you see more oil coming out – it’s a sign that you should replace the packing.
#2: Isolate the Driver and the Pump
Safety is the most critical factor of any repair. If you see any leakages – make sure that you disconnect the driver from the pump and let it cool down before you proceed.
#3: Remove the old Packing
While some leakage problems might occur due to poor sealing, or untightened elements, most of the issues happen due to faulty packing. Therefore, your next step should be to remove the old filler from the industrial pump unit. You should never add a new layer of packing on top of the old one. Just “patching” the packing with the layer of new material will not prevent future leakages, and you will likely face the same problem within 1-2 months if you take this approach.
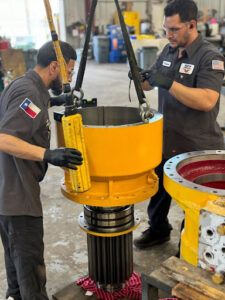
#4: Pack around the shaft to prevent Further Damages
Once you remove the faulty packing, make sure to clean the stuffing box and inspect the shaft. Do you see any excess dirt, metal scraps, or any other signs of abnormal wear? If you are from Texas and this is the case – you might consider seeking out professional industrial pump repair in Houston for further inspection
Assuming that your shaft is in decent shape, you should start filling in the new packing, making sure that you leave no gaps at the joints to prevent leakage. If you do see signs of wear or damage to the shaft, do not reassemble. Speak with your Houston pump repair experts to see if the shaft is a candidate for repair via High-Velocity Oxygen Fuel (HVOF) spray services or reverse-engineering and remanufacturing.
You may now proceed to fill the stuffing box, keeping a few things in mind:
- You should screw each joint at a 90-degree angle compared to the previous one
- Align the lantern ring with the coolant port attachment
- Always seal tight and don’t use any sharp tools to avoid scratching the surface of the shaft.
Completing the above will ensure that your new packing is waterproof to prevent leakage.
#5: Tighten the Followers on the Packing Gland
Now that the hard part is over, you will need to recheck the leakage on the working unit. Is the rate of leakage still high? Then you need to tighten up the followers until the leakage stops. Do so gradually (something around half a rotation every 10 minutes should do).
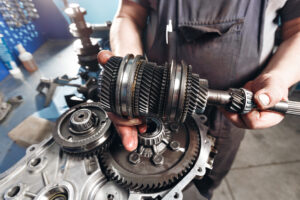
#6: Clean & Inspect Bearings and Couplings
During the prolonged production process, bearings often overheat and can become contaminated with metal shavings over time. That’s why you need to clean all the fittings and grease cups once your industrial pump cools down. Do you see scrap metal shavings in the bearings, seals, or couplings? If this is the case – you will need to replace them..
#7: Lubricate the Components
Now that you removed all the grease and foreign bodies from the components, it’s time to lubricate them. Be sure not overdo it because excessive lubricant creates more heat during pump operation.
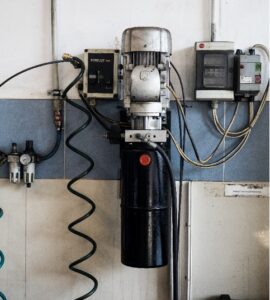
#8: Check the Motor Strength & Pump Flow
Re-assemble your industrial pump unit and test it. Does the motor work the way it’s supposed to and generate enough pressure? If you are still facing some issues, you would need to bring the pump motor to an industrial pump repair professional for a checkup.
#9: Run Vibration and Temperature Tests
Last but not least, you need to run a couple of tests to make sure that your industrial pump is good to go. First, find the manual for your pump, which will have the average operating temperature and vibrational values. Now, turn on the pump and let it run for a couple of hours. At last – measure the vibration and temperature of the pump using a vibration meter and infrared thermometer. Make sure to check multiple points on the unit. If the pump is too hot, making more noise than usual, or is vibrating too much, then it’s a sign that you need to bring it to a professional technician.
Feeling Overwhelmed? Call Industrial Pump Repair Professionals Today.
If the steps mentioned above did not help you solve the problem (or if you don’t feel technically qualified) – have your industrial pump repaired by industry-leading professionals instead.
At Houston Pump and Gear, we have over 16 years of servicing industrial pumps and gearboxes all over the USA, Canada, and Mexico. We offer gearbox exchange, pickup, and delivery services and work with many brands. Just to name a few:
Call us today to get a free quote.