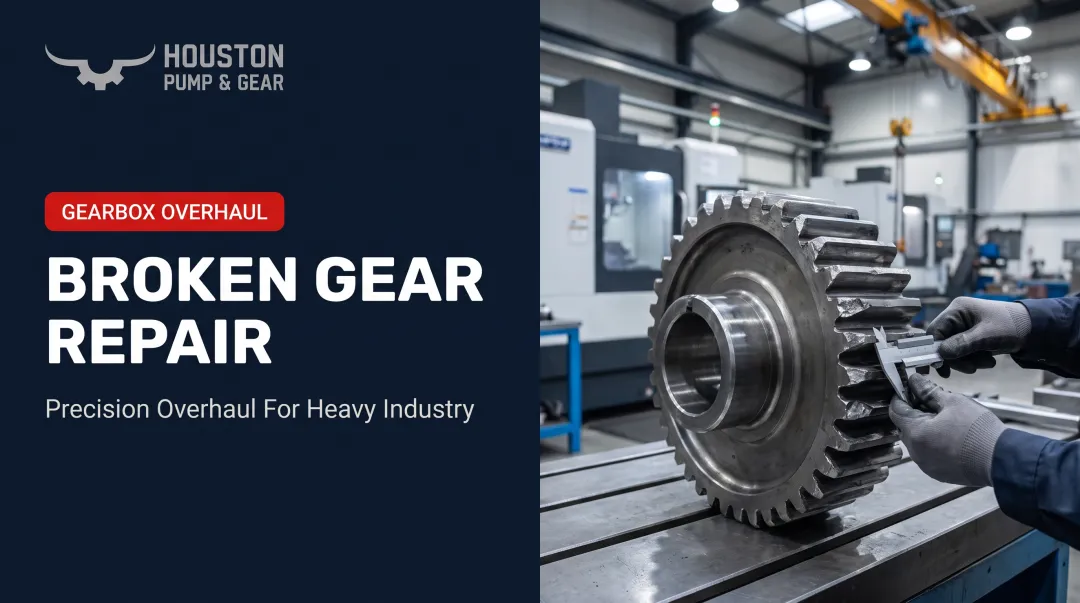

Gear teeth wear or break for predictable reasons: load stress, misalignment, lubrication failure, or contamination. Left unaddressed, minor pitting turns into a snapped tooth and an unplanned shutdown.
This article covers the common failure patterns, what causes them, a step-by-step repair process, how to decide between fixing and replacing, and when it's time to call in a specialist.
TL;DR
- Common gear tooth problems: surface wear/pitting, chipped or broken teeth, fatigue cracking, and misalignment-related wear
- Most damage is repairable through welding, insert methods, or resurfacing, but heavy tooth loss or deep cracks usually mean replacement
- Repair process: diagnose the damage, confirm the root cause, apply the matched fix, then test under load
- Emergency failures at power plants and industrial sites demand 24/7 response; Houston Pump & Gear delivers same-day pickup and rapid repair
What Is Gear Teeth Repair?
Gear teeth repair and rebuilding restores worn, chipped, or broken gear teeth to functional geometry. Depending on the damage, technicians bring the tooth profile back to spec using:
- Welding to rebuild chipped or broken sections
- Precision machining to restore profile geometry
- Insert methods for severely damaged teeth
- Resurfacing to correct worn contact flanks
Gear teeth do the actual work inside a gearbox: they transmit torque and rotational power between shafts, often multiplying torque while reducing output speed. That constant, cyclic loading is exactly why teeth degrade over time.
Because gear teeth are high-stress components, they need periodic inspection and, when damage shows up, targeted repair. Skip that step and a single cracked tooth can cascade into a catastrophic gearbox failure that takes a plant offline for weeks instead of days.
Common Problems With Gear Teeth (And Why They Happen)
Most gear tooth failures follow one of a handful of predictable patterns tied to load, lubrication, and alignment.
| Failure Mode | Symptoms | Likely Cause |
|---|---|---|
| Surface wear and pitting | Rough tooth surface, increased noise, reduced efficiency | Inadequate lubrication, contamination, or extended service life |
| Chipped or broken teeth | Sudden vibration, knocking noise, metal debris in the oil | Shock loading, jamming, or fatigue cracking |
| Fatigue cracking at the tooth root | Hairline cracks, progressive noise increase before failure | Cyclic overload or improper heat treatment |
| Misalignment-related uneven wear | Wear concentrated on one side of the tooth face | Improper installation, shaft deflection, or bearing wear |

Pitting is the most common gear-tooth failure mode. It develops when repeated contact loading exceeds the surface's fatigue strength.
Houston Pump & Gear sees the same root causes across industrial gearbox repairs: poor lubrication, misalignment, overload or shock loads, and metal fatigue. Left unaddressed, these problems cut efficiency, trigger unplanned downtime, raise safety risk, and can force a full gearbox replacement.
That downtime is expensive. According to ABB's 2023 Value of Reliability survey of over 3,000 plant maintenance leaders, unplanned outages cost the typical industrial business $125,000 per hour.
How to Fix Gear Teeth (Step-by-Step)
Jumping straight to a repair without properly diagnosing the failure mode wastes time and money. It also risks the exact same failure happening again in six months. This process matches the correct repair method (welding, insert, resurfacing, or splicing) to the actual damage.
Step 1: Inspect and Identify the Exact Damage
- Visually inspect for pitting, cracks, chipped teeth, or uneven wear patterns
- Check for abnormal noise, vibration, or heat during operation
- Use dye penetrant or magnetic particle testing to detect surface cracks invisible to the eye
- Document load conditions and operating history
Step 2: Confirm the Root Cause
Determine whether the damage stems from:
- Lubrication failure
- Misalignment
- Overload
- Material fatigue
Rule out contributing factors like coupling wear or bearing failure feeding stress into the gear mesh.
Skip this step and you'll repair the symptom, not the problem. The tooth will fail again.
Step 3: Apply the Correct Repair Method
| Damage type | Repair approach |
|---|---|
| Isolated chipped/broken teeth | Insert-tooth or splicing: cut out the damaged section, weld or bolt in a matched replacement segment |
| Worn tooth surfaces | Resurfacing via weld build-up, machining, and re-cutting the profile (if root fillets remain sound) |
| Fatigue cracks | Grind out the crack front, or saw-cut and rebuild the affected section on larger gears |
Before reassembly, confirm uniform tooth pitch, correct hardness, and proper heat treatment following any weld work. Skipping this quality check is one of the fastest ways to turn a repair into a repeat failure.
Step 4: Test and Validate the Repair
- Run the gearbox under normal, then peak, load conditions
- Monitor noise, vibration, and heat against baseline benchmarks
- Confirm even tooth engagement with no recurrence of original symptoms

Houston Pump & Gear applies this same discipline on complex industrial gearboxes. When a power plant's Lufkin S2212C went into emergency shutdown, the team picked up the unit the same day and had it back in service within 72 hours, fully tested before it left the shop.
When Should You Fix vs Replace Gear Teeth?
The right call depends on how widespread the damage is, the size and value of the gear, and how fast you need the line back up. Weigh repair cost, downtime, and long-term reliability against full replacement before you commit.
A few isolated broken or chipped teeth on an otherwise sound gear
- Fix: insert or weld repair is usually cost-effective and durable
- Replace: only if the gear is small, low-value, or repair would compromise structural integrity
Widespread pitting or surface wear across most teeth
- Fix: resurfacing works if root fillets are intact
- Replace: necessary once wear has progressed past the case-hardened layer
Cracked or fatigued large ring gears/girth gears
- Fix: splicing or sectional rebuild can restore critical large gears economically
- Replace: recommended when cracks are extensive or NDT shows deep internal fatigue
Emergency shutdown situations
- Fix: rapid emergency repair restores service and cuts costly downtime
- Replace: only when no viable repair exists and a spare or exchange unit is immediately available
A practical rule of thumb: if a repair estimate exceeds roughly 75% of a new gearbox's cost, replacement usually makes more sense. A qualified repair often costs about 40% less than a new unit and still adds years of service life.

Preventive Measures and Mistakes to Avoid
Good repair practice and prevention go hand in hand. Both protect uptime and the maintenance budget.
Common mistakes:
- Treating symptoms instead of diagnosing the root cause
- Skipping post-repair load testing
- Using mismatched or incompatible weld materials
- Ignoring the lubrication issue that caused the original failure
Preventive actions:
- Schedule regular gear inspections and check tooth condition specifically
- Maintain proper lubrication and shaft alignment
- Monitor vibration and noise trends over time
- Keep documented maintenance records for every unit
Grinding, whining, or clunking noises are early warning signs of damaged gears, poor lubrication, or misalignment — not something to wait out.
Partnering with an experienced 24/7 provider for scheduled inspections and rapid response, like Houston Pump & Gear, cuts the risk of a minor tooth issue turning into extended, costly downtime.
Conclusion
Most gear teeth issues are repairable if caught early and diagnosed correctly. The key is matching the repair method to the actual damage and the underlying cause — otherwise you're just delaying the next failure.
Knowing when to fix versus replace, and having a trusted rapid-response partner on call, saves both cost and downtime. That's the difference between a planned maintenance window and an emergency shutdown.
Frequently Asked Questions
What are the common causes of gear teeth failure?
The primary causes are lubrication failure, overload or shock loading, misalignment, and material fatigue. Most failures trace back to one or a combination of these factors.
Can broken gear teeth be repaired instead of replacing the whole gear?
Often, yes. Tooth inserts, welding, or splicing can restore functionality without a full gear replacement, depending on how extensive the damage is.
How long does a gear teeth repair typically take?
Timelines depend on damage severity. Houston Pump & Gear completed an emergency Lufkin S2212C repair and returned the unit to service in 72 hours.
Is it safe to keep running a gearbox with worn or chipped teeth?
No. Continued operation risks sudden failure, cascading damage to shafts and bearings, and safety hazards for personnel nearby.
How do you know if a gear needs full replacement instead of repair?
Crack depth, tooth loss, and non-destructive testing results decide the call. If repair isn’t viable, full replacement is the safer, more economical option.
What should I do if a gearbox fails unexpectedly at a power plant or industrial site?
Contact a 24/7 emergency gearbox repair provider immediately. Prioritize same-day pickup capability and a documented rapid turnaround record.